Documentation

Logic & variables in templates
Learn here how to create more engaging emails by using variables. Variables enables you to deliver personalised content for the recipient of your emails.
Getting started with variables
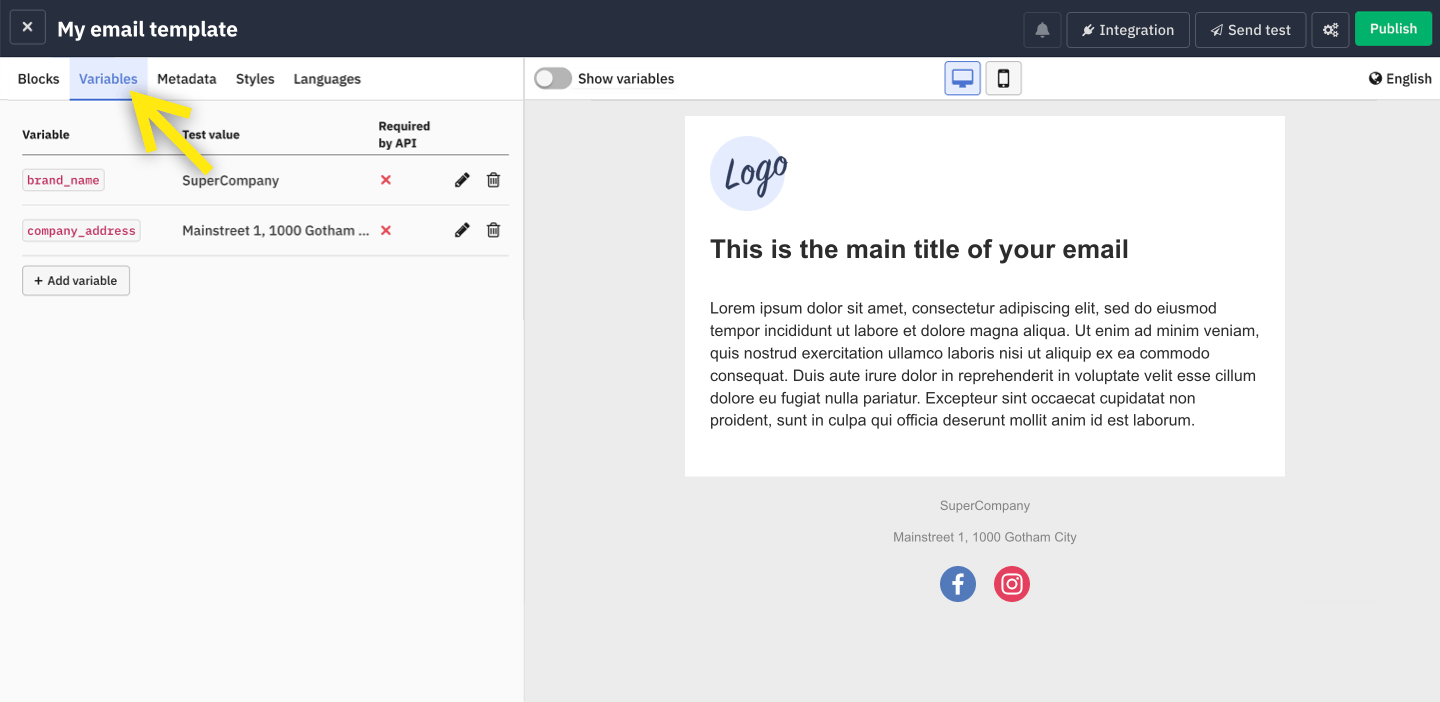
Variables are defined for each email template in the Variables tab in the editor.

Variable attributes
Variable key
This is the string that you will use in the API request.
Variable test value
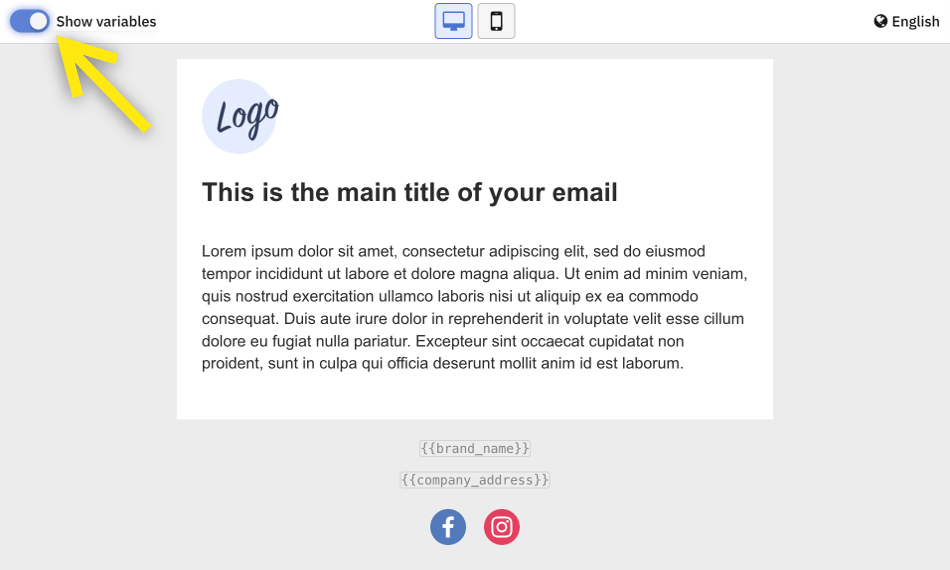
The test value can be used for testing and previewing the email template. Use the switch Show variables to toggle between the variable key and test value.

Variable type
The type of the variables (Text, Number or Json) serves as a validation and transforms the input value to it's defined type.
Required by API
The checkbox Required by API causes the variable to be required for the API request. If you don't provide a value for the variable the email won't be sent and you will receive an error message in the API response.
This security mechanism prevents the sending of emails with missing required variables content (emails with incomplete content).
Usage of variables in email templates
You can use your variables in either the ready-made blocks or in the code editor, if you code your own template. In the request to send the emails you then provide the value of the variables.
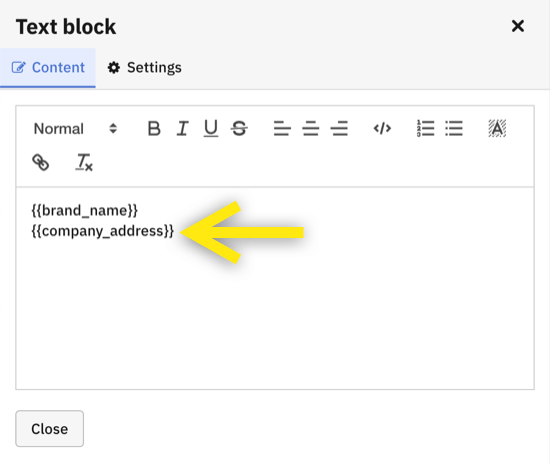
To render a variable you simply write the variable key as {{ your_variable_key }} in any
block of your choice (for example a text block).

The variable will immediately be rendered in the preview with your test value. To make your variable key visible in the email template use the Show variables switch above the preview.
Supported commands in email templates
Next to variables you can also use some inbuilt commands to created conditions and loops.
Conditional logic (if-else)
You can use if conditions to create emails with content that changes dynamically based on the recipient. This is very useful as emails that are personalized to the recipient tend to generate more engagement.
By using if conditions you can cover multiple scenarios in a single email template by displaying different sets of content based on the recipient attributes that you pass in your API call.
Common uses of if conditions in emails:
- Gendered email greeting: for example Dear Mr. Smith, Dear Mrs. Miller or simply Hello for recipients without gender or name data.
- Promotional offer based on the recipient's purchases or other attributes. For example you could show a seasonal banner based on the date the email is sent.
- Upselling by showing specific products based on a recipient's purchase history.
How to use if-else conditions
The following code example illustrates the usage of an if-else condition. In this example the condition is
determined
by the value of the {{ gender }} variable.
{% if gender == "female" %} Dear Mrs. {{ last_name }} {% endif %}{% if gender == "female" %} Dear Mrs. {{ last_name }} {% else %} Dear Mr. {{ last_name }} {% endif %}{% if gender == "female" %} Dear Mrs. {{ last_name }} {% if gender == "male" %} Dear Mr. {{ last_name }} {% else %} Dear customer {% endif %}
For loop
Use a for loop to insert a dynamic list of items in your emails. This could be for example a list of items purchased.
The following code examples illustrate the usage of the for loop condition:
  {% for item in my_list %}
    Show my {{ item }} with index {{ forloop.counter0 }} or index starting with 1 {{ forloop.counter }}
  {% empty %}
    The list is empty
  {% endfor %}
Usage of variables in API requests
To pass data to your API request, add the values as a dictionary to "context". An example is displayed in the integration window of any email template. This is how it could look like:
payload = json.dumps({
  "identifier": "my_email_template",
  "receiver": "john.smith@email.com",
  "language": "en",
  "context": {
    "first_name": "John",
    "last_name": "Smith"
  }
})
